
Control Parameters and Virtual Parameters a Series on Scripting in OnPing
Table of Contents
1 What are we doing?
We will extend the gathered information in a system using control parameters and virtual parameter. This will be illustrated by constructing the following example parameter set:
- min
- max
- accumulated
- average
This guide will introduce several techniques available to manipulate data in OnPing. It will be the first installment of an OnPing series walking through how to build and use more advanced parameters within the OnPing enviroment.
In this guide, we will explore the first step to using advanced parameter – making them! Future posts will cover how to design a template system with which to deploy the parameters we are creating here.
2 Why Scriptable Systems?
One of the main themes of onping is reducing code. So if that is true, why add a script language?
The answer to this question is: Some tasks are just best accomplished in code!
3 Getting Started
First, lets look at the data we have.
3.1 The Best Bread Bakery
The Best Bread Bakery utilizes a cloud SCADA component in their digital architecture. This allows quick adjustment and customizaton of how data is organized. In the example below, it appears they calculate the performance of each machine and display the metric in an HMI overview.
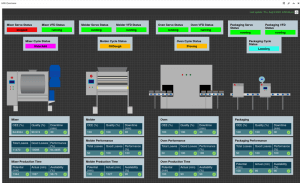
Overtime, the Bakery decides a few parameters can be added in the system to improve the performance summary.
- Uptime
- Monthly Max uptime
- Monthly Min Uptime
3.2 Control Parameters and Virtual Parameters
Two kinds of parameters are available to add these new calculated values into OnPing:
- Control Parameters
- Virutal Parameters
3.2.1 Control Parameters
Control Parameters (CPs) are managed locally through Lumberjack Application System (LAS) and live ‘on the edge’ in a local Lumberjack. CPs can access the history and parameters of the Lumberjack. Their execution may be set according to several variables, including by Event, Schedule, or even Frequency.
These edge-located parameters are defined in OnPing by the parameter they write to. This means they can create a new data point (if tied to a manual-entry device in OnPing) or they can be used to script a value directly into an existiing device. In many ways, CPs are the building blocks for OnPing scripts.
Note: Control Parameter values are written and stored to CPIDs, so the historical data is retrievable in OnPing.
3.2.2 Virtual Parameters
Virtual Parameters (VPs) run on OnPing’s cloud servers and can access parameters from anywhere
you have permissions for in OnPing. VPs are calculated upon request an neither write nor store values.
Many tasks can be completed without the need for historical tracking. Virtual Parameters are also the most affordable tags in OnPing. The flexibility of these tags makes it a great resource for maximizing the value of your data – without increasing the overall cost of the system.
While VPs are a valuable resource for OnPing Users, it is important to remember they are not 1-to-1 replacements for Control Parameters. In fact, Virtual Parameters require at least one input Control Parameter to be contructed. On-demand calculations can also suffer performance problems while running complex commands.
In the end, Virtual Parameters should be treated as powerful supplemental features to the OnPing environment. Users can’t build an effective system using *only* VPs, but they can be used to add tremendous value onto a solid foundation.
3.2.3 Which Will We Use?
We will define each of our key values with a Control Parameter, then use Virtual Parameters to make the values graph a little nicer in analysis systems. CPs will give the Bakery access to historical data for key data streams (enabling features like Time Travel later on), and the VPs will let them utilize the data across a variety of applications.
3.2.4 Structured-Script
OnPing uses a scripting language called ‘Structured Script’. It is very similar to ‘Structured Text’ but does have some differences. The best overview for the language is here.
One major difference between structured-script and many other languages is the concept of Unit. OnPing parameters (virtual or control) process data as a stream.
At a deep, granular level, this means data is not always available at a specific moments in time – so some solution (in this case, Unit) is required to make things make sense. Practically speaking, it just means OnPing does a lot of work behind the scenes to represent data in an intuitive manner.
We have a lot of support to help you remember this is possible. The main structure for ensuring a stream has data looks like this:
example := latestInput(1);

if (isUnit(example)) then

output := ();

else

output := example/2;

end_if;
We can’t do math like example/2 until we show the math will not hit a unit value.
4 Building the Control Parameters
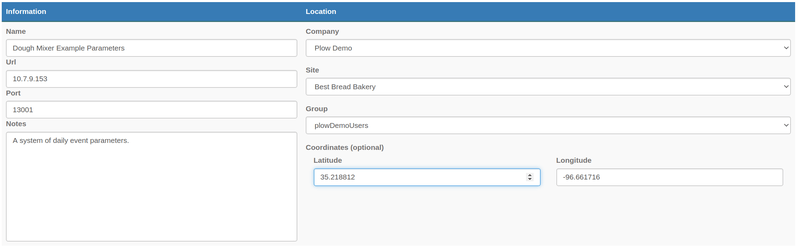
4.0.1 Create a Target Location
Control parameters are defined by their output so first we will make a new Manual Entry
location to target for control parameters.
4.0.2 Add Output Parameters
Once the location is defined the outputs are added.

4.0.3 Add the Scripts
To add a Control Parameter, look up the device by Lumberjack ID. A list of output parameters will generate.
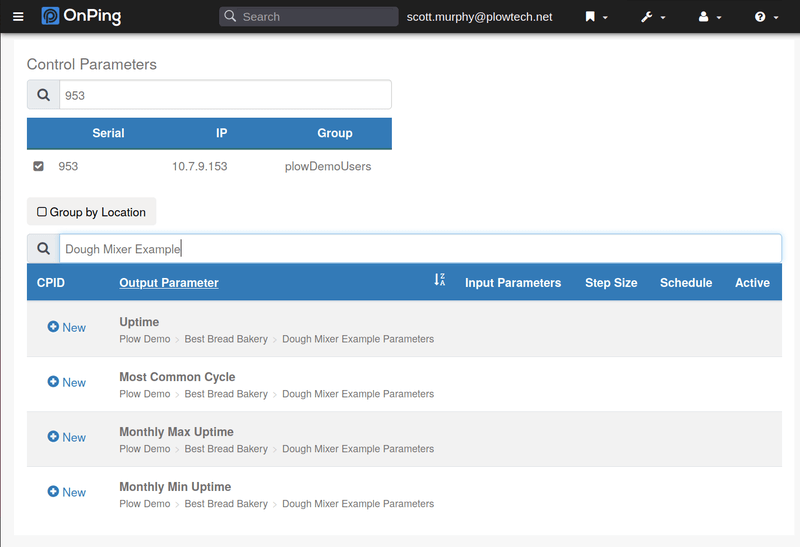
- Uptime
After clicking
New, the screen for constructing Control Parameters will appear.
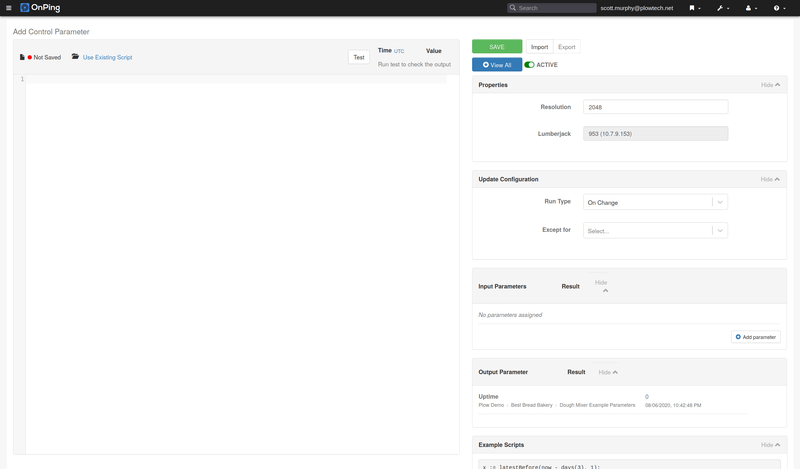
Here you can see several sections.The properties section has the
- Resolution, which controls the granularity of the parameter history.
- Lumberjack, simply the ID of the lumberjack
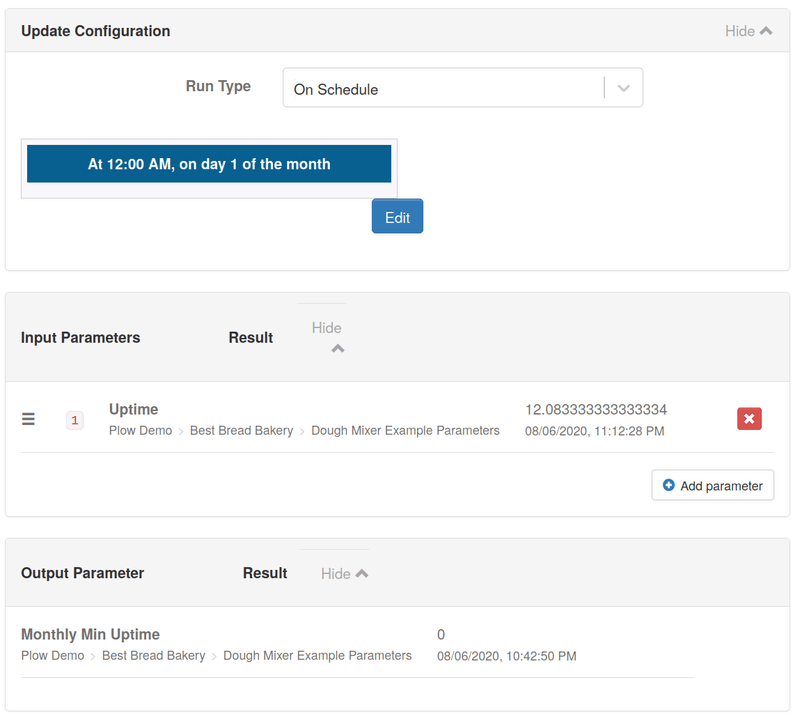
- Update Configuration
The update configuration sets when a control parameter is calculated and its output is updated. We will run our scripts on a scheduled time 12:00AM.
- Input Parameters Output Parameters
The output parameter can’t be changed. The input parameters are any parameter saved on the Lumberjack. We will select ‘Run Status’ of the mixer for example.
- Example Scripts
The example scripts give you a quick reference for several methods.
- Edit Screen
This is where scripts are written. It is also where the output is shown during testing. ‘Test and write’ will save a value to the output parameter.
- Enough of all this. Let’s write a script!
acc := 0.0;

WITH t FROM now - days(1) TO now EVERY minutes(1) DO
  x := input(1,t);
  IF not(isUnit(x)) THEN

  IF (x == 1.0) THEN

    acc := acc + 1.0;

  END_IF;


  END_IF;
END_LOOP ;

/* Output Hours Runtime */
output := acc / 60.0;
We gather 1 point every minute and check that a value is there, if it is we add it to a running total. At the end, we convert the total into hours and save the result to output. That is it!
- The rest
- Monthly Max/Min Uptime
- Ran Monthly
- Use Uptime – we just made this as the input
max := latestBefore(now-months(1), 1);

if not(isUnit(max)) then

WITH t FROM now - months(1) TO now EVERY days(1) DO
  x := latestBefore(t,1);
  if not(isUnit(x)) then
    if (x > max) then
      max := x;
    end_if;
  end_if;
END_LOOP;
output := max;


else

output := ();

end_if;
Lots of neat things are going on here. We use the defined date and time functions. For example,
monthsis defined as, “1 month back from whatever the current month is”.We use
latestBeforeinstead ofinputto gather the values this time. This allows us to just go lightly through the historical values and let OnPing do the work of finding where the uptime actually is and giving it to us.‘Min’ is defined the same way but with the opposite sign.
min := latestBefore(now-months(1), 1);

if not(isUnit(min)) then

WITH t FROM now - months(1) TO now EVERY days(1) DO
  x := latestBefore(t,1);
  if not(isUnit(x)) then
    if (x > min) then
      min := x;
    end_if;
  end_if;
END_LOOP;
output := min;


else

output := ();

end_if;
- Monthly Max/Min Uptime
5 Building the Virtual Parameters
We could just stop here, the control parameters define the data we need. But it would be nice to map the value being calculated to anywhere in a trend line.
There is an existing script we have that is perfect for this sparseDataMapper and it is a perfect item for a virtual parameter.
5.1 Components of the Virtual Parameter Screen
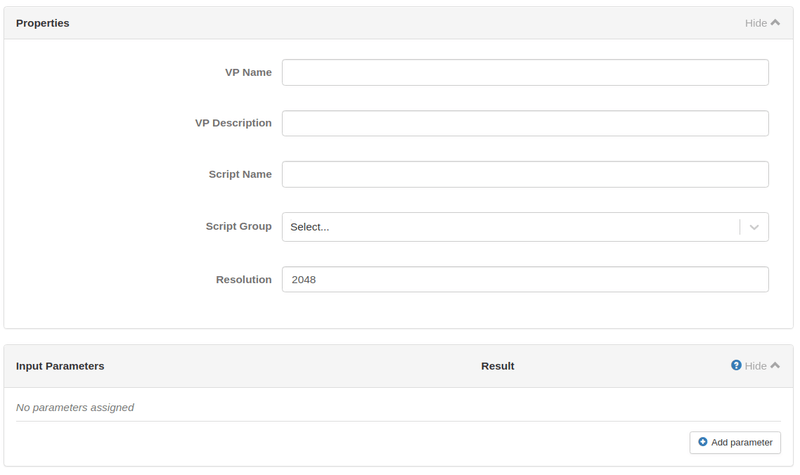
5.1.1 Properties
- VP Name – The name displayed everywhere
- VP Description – The description of what we are building
- Script Name – The name of the script for future use
- Script Group – Permissions for the script
- Resolution – The amount of approximation used (I will write a whole blog post at some sort)
5.1.2 Input Parameters
Just like control parameters, these are the parameters used to do calculations. But unlike control parameters, you can pick any parameter you have access to. We will pick each of the control parameters we made, one by one.
5.1.3 Editor Screen
Again very similar to the CP Editor, but without the test and write function. Since there is no “write”.
5.2 Using Existing Script
For this parameter we are using an existing script.
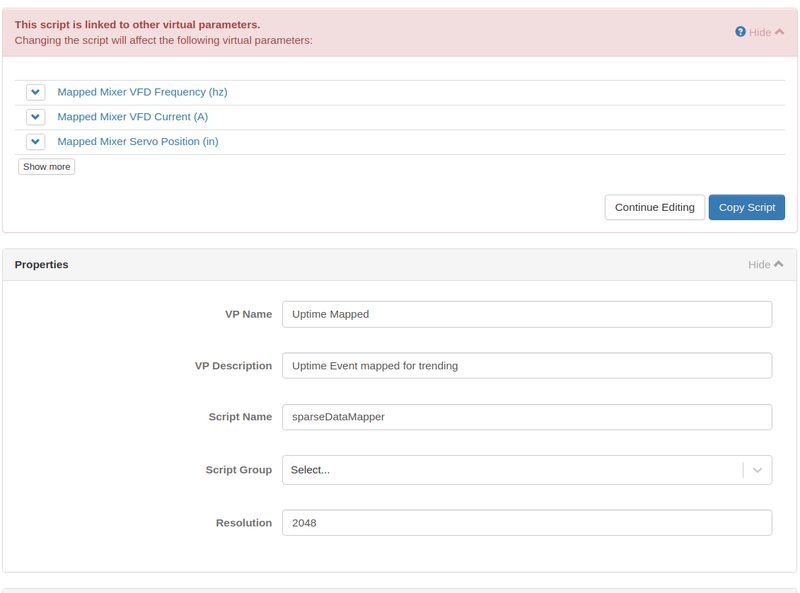
We need to select continue editing and name it.
The script is just…
output := latestInput(1);
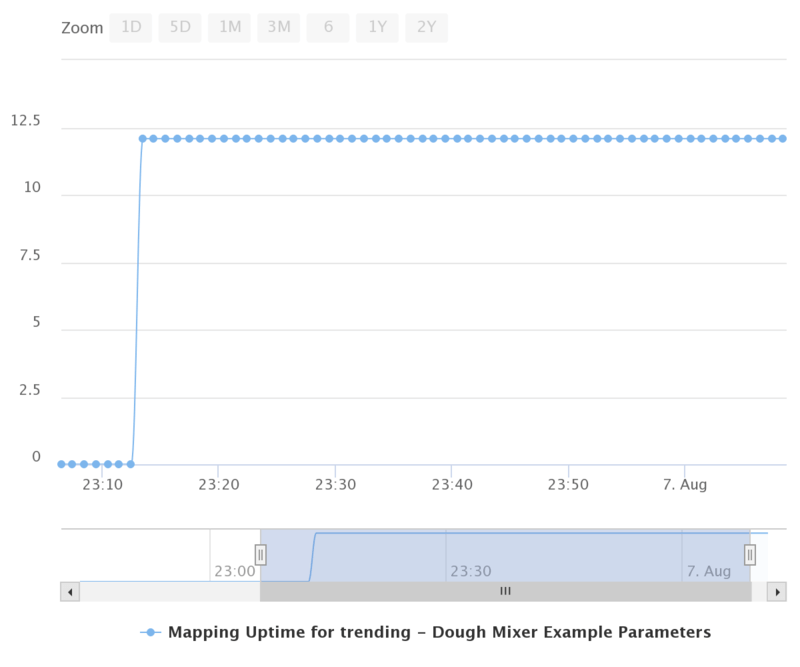
Now we can see a clean line for the uptime (even though it is only calculated at one point).
6 Now What?
We can use these parameters in any context we want. However, it is a lot and we wouldn’t want to do all this over and over. In the next post we will show how to templatize making these for multiple machines or sites.